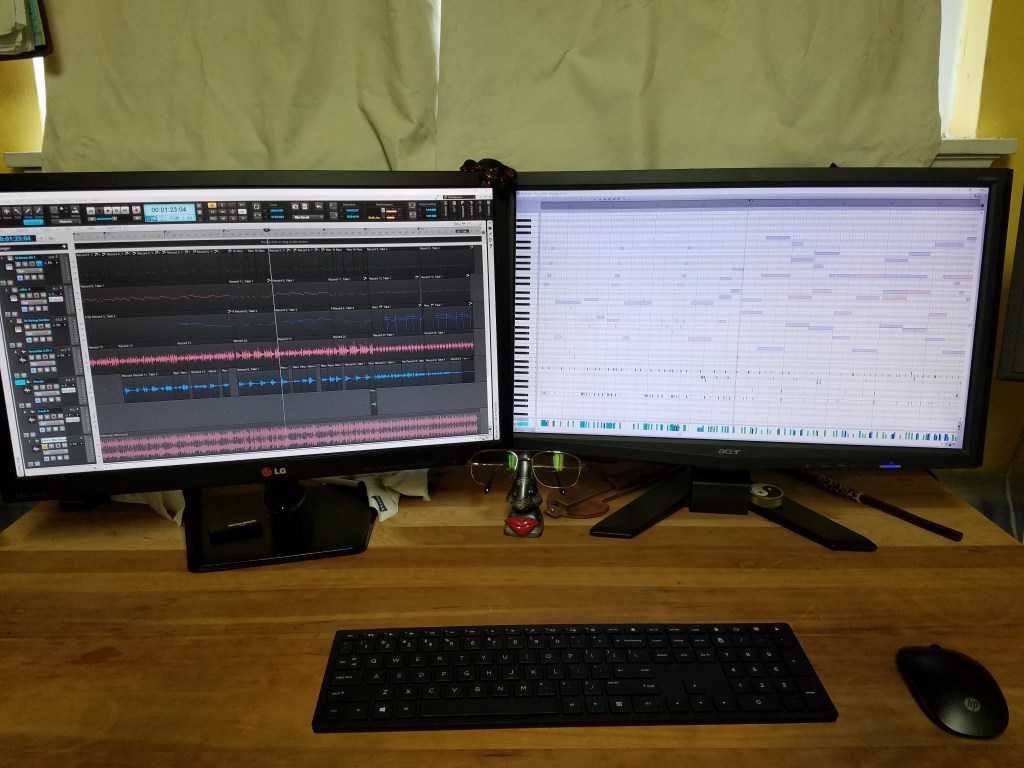
Archive for the ‘Midi Series’ Category

As a musician I look at time a bit differently than others might. I am reminded of this when I see movies or videos of people working out and doing exercises. Even the simple ‘count to ten’ is often a reminder that most people don’t count time correctly.

It is easy to count ten items – you start at 1 (one) and stop when you get to 10 (ten). To sound it out aloud counting ten items would go like this…….

1, 2, 3, 4, 5, 6, 7, 8, 9, 10. You do indeed have ten items.

But counting time is different. A second is not a single point in time but a defined length of time. If you followed the above approach you would end up with 9 full seconds as shown below. (if tied to a metronome or equivalent)

1 – 2 – 3 – 4 – 5 – 6 – 7 – 8 – 9 – 10.

Use the dashes to represent the full length of each second. Total them up and you end up with only 9 full seconds, not 10. There are easy ways to break this habit.

Start with the number 0 (zero) when counting time. This will give us 0 – 1 – 2 – 3 – 4 – 5 – 6 – 7 – 8 – 9 – 10.

Now, when you total the dashes you get ten full seconds. A lot of people count faster when counting up, and but more accurately when counting down. Like a rocket launch or New Year’s celebrations, this steady rhythm has been in our culture for a long time. Try it.

For items start with the number 1, but for time, start or end with the number 0. Each second, minute or hour lies in between each pair of numbers, not within the number itself.

Holidays are fun with creative people.

I often mention my talented wife and children sprinkled within posts over the years. When the girls were very young we made Christmas and the holidays a creative fest whenever possible. From pumpkin carving parties with over 200 pumpkins, costumes and haunted houses, we put our own flair into everything. We avoided the commercial and traditional.

Each year we would send our many friends a hand-made original Christmas ‘Card’. We would start two months before Christmas to imagine, design and create a unique holiday greeting from our entire family. Many are still hung up or placed on mantels to this day. It is hard to describe so you can get an idea of the projects. One time we made small cloth trees decorated in style with a hook on them so you could hang them as an ornament. Another year we took clear glass ornamental globes and other shaped bobbles and poured paint inside making them sparkle with bright colors and/or glitter on the inside of the glass.

As a musician I built up a small home recording studio over the years. In the lyrics we reference “7 tracks and SMPTE”. I had a digital recorder back then but advanced as it was at the time it only had eight tracks, and one of them you used to record a clock signal so it would sync with the MIDI instruments I had controlled by a hardware sequencer (RECORDING WAS A LOT HARDER IN THOSE DAYS!!!). Every few years I managed to work in a family musical project. Here are two audio recordings we sent as that year’s ‘card’.

This tradition really became a thing and people looked forward to getting their next card, knowing it would be unlike any other they would receive that year, or ever again.

Here is my family recording two Christmas carols for our annual card project. One is a traditional cover of a song you are familiar with. The other is our version of a classic. Even if you aren’t ‘all about Christmas’ and everything, I think you will find this cute and maybe hilarious at the same time.

I wish you all well and hope we can keep lost loved ones close to our hearts and friends and family in our thoughts.

MIDIMIKE

The Kennedy’s carol
The Kennedy’s Original 12 Days

I have a rough version of a new song called “What You Want”. Well, it is called that now because I put lyrics to it from an earlier Lyric Post.

This is a tune using an old Yamaha drum machine I recently became caretaker of. I set up a nice but simple drum pattern using my Alesis MIDI drum pad and recording again in Studio One 5 by Presonus. I am using the internal sounds in Studio One 5 to play the bass guitar parts, triggered by an M-Audio MIDI keyboard I got with the drum machine and some other cool toys.

After the beat was down and feeling a bit more fun to play with, I added the two guitar parts using my Ibanez electric guitar. I recorded two tracks but instead of hooking up my amplifier and all my pedals, I plugged straight into the mixingboard so it would go direct-out to my computer input.

I used one of the many plug-ins included with Studio One 5 to add effects to the guitar. The built in guitar tuner plug-in is also really handy and I like the way it operates. So no need to connect to a tuner after each practice take. Each guitar track used the same plug-in but set to different guitar effects.

I am working on adding vocals but for now here is “What You Want”.

Music for my new song “What You Want”

I have been working with a new suite of audio recording and mixing software for the last two weeks called Presonus. I am using their Studio One 5 bundle. I am starting to get the feel of how it works. A bit of a learning curve and unlearning curve from other programs, but very flexible interface and great sounding plug ins.

Here is my first tune noodling around with the functions and features. A simple groove I call ‘Forward’.

Forward by MSK

The great thing is the new software automatically imported all the instruments, effects and and plug ins I already had. These are all ‘virtual’ instruments from the sound and effect plug ins. I use a MIDI keyboard controller for most of the input for instruments.

I hope you enjoy this one for a few minutes in your busy days.

Sonar Track Panel Wave and MIDI files that generate sounds from computer programs called plug-ins

I mentioned experimenting with an on-line jamming program. It became the clipboard for a few guitar sections I created while waiting for one thing or another to work. I titled each as verse, bridge, chorus, etc. I had to give it a project name to save the clipboard and I came up with “Not Now”.

I used those short pieces and assembled them into a song arrangement. Once the chords and arrangement were in place I naturally started thinking of lyrics (as I have a tendency to do). The file was named Not Now so I kept it as my Cakewalk (BandLab) project name. So it becomes the theme of the lyrics. In one hour they were written. Getting them to match the odd rhythms and sparse instrumentation became a challenge. It took me a few days to come up with the melody and then practice it enough to get the rough tracks down. To all just joining; I get things down to rough tracks and then write another song, poetry, lyric or instrumental. When I was young I hoped some band would do my songs correctly in a studio. I am not young now.

Here is a rough mix of “Not Now”. I used a Martin Acoustic/Electric guitar for the guitar track. Using my MIDI keyboard I pulled up a plug-in for drum sounds. I imported the original noodling guitar parts I did from the clipboard but they were not recorded to a metronome or drum pattern. I listened and figured out the tempo of the segments and set Cakewalk to match. That way I could listen to the short guitar segments as I created the basic drum parts and arranged all the segments in order. I pulled up a bass guitar sound and played the MIDI keyboard to generate the bass line.

Next, I Muted the original guitar tracks and recorded a new track to replace it. The song seemed to cry out for strings but that is usually just me. I like good sounding strings in various styles of music.

Lyrics were posted here: https://midimike.com/2020/06/01/not-now/

I use two monitors as there is a lot of information to keep ‘track’ of even for a small project.
This is the Piano Roll view. Each color represents different instruments. The lower group triggers drum sounds.

I gave a link to BandLab above. Full disclaimer this is not a commercial and I do not get paid for anything I do here. However….. if you are interested I used to pay hundreds of dollars every year or so to keep this great recording program updated. They now offer the program and all updates for FREE. No kidding.

I hope you enjoy “Not Now”. Each time I listen to it I like it more. Again, this is just me as each new song I write becomes my newest favorite.

If just for a little while.

The lyrics for “The Border” were posted earlier. There is also a little story to this song using the link above.

…….. for the nerds and geeks in the audience, I created the song in Bandlab’s Sonar (formerly Cakewalk Sonar). This is not a commercial but if you are interested in recording, podcasts, audio to video and a bunch more, BandLab bought Sonar out of bankruptcy and is making this program free to download and use!!! Argh! I paid hundreds of dollars each year to keep current and have new toys.

I am not against commercials or someone making a bit of money but there really is no connection here. If you want to download Sonar, search for BandLab and hit the download button. It is a powerful multi-track recording program with sounds and plug-ins ready to use. I could give you the link but that would seem like I am pushing it lol!

Here is my new song, “The Border”:

“The Border” (C) MSK 2-11-2020

20150215_173005Not only do we have 16 channels of MIDI available (per cable…. Other cables can carry 16 more channels as you expand) but we also have 128 steps or individual notes that can be assigned to each channel or voice.  (again, if your device counts zero as a number, you will have 0 – 127)  This is particularly important for triggers and non-sound system controllers.  For example, if you are playing a MIDI keyboard, sax or reed controller as Master, you are not normally trying to redirect a C# to an F, though there are reasons for doing this in some special circumstances.  You just want to perform your song on the Master Controller and have your performance represented as you played it – for better or worse!

However, for drum kits and other triggers it is crucial to set up in advance the sounds that will be played when a specific trigger is hit.  Usually you can change this in the Master Controller itself.  Pick the channel and the specific pad/key you are editing and go to the Menu Options page.   Select MIDI Note Number options.  There are too many ways today’s gear will get you there or what they call it so it is hard to make this specific to all, but that is what the owner manuals are for!  As your Master Controller is connected properly to the receiving tone generator or receiving device, hit the pad or key or button you are trying to edit.  You should be able to see the note number the current pad is assigned to.  Continue to raise or lower this number one digit at a time or enter the KNOWN MIDI Note Number and then Enter.  Once you are triggering the correct sound, sampler or other gear, go to the next pad in a similar mode until all assigned pads correctly trigger the intended receiver.  Save everything and pat yourself on the back!  Keep in mind you can do this over and over depending on project, recording or performance needs.  Most devices will allow you to store and recall a large number of performance templates or basic ‘kits’.  Take advantage of this tool!   Once you set them up, you can use them forever and make your set up time amazingly quick. 

As a keyboard player in a progressive rock band, I used specific keys or notes on my keyboard(s) that were outside the range of the cover or original tune we were playing and assigned them to trigger internal drum sounds like claps or cowbells, effects like record scratching and anything from applause to choir back-up notes.  I never used a sampler that would ‘play’ parts, I just added to the layers by using on-board sounds as a split keyboard arrangement or as real-time triggers to other devices. 

I used to play in the days when you had to have a different keyboard for each sound group you wanted.  If you wanted an electric piano, you played the Rhodes piano.


 20150215_172119 If you wanted an organ sound you carried around a Hammond or other organ.  If you wanted to use synthesizer sounds, you brought in a Moog or Arp and played two sounds at a time ……. and it felt glorious! 

Now you should have a comfortable of understanding – MIDI is a communication system between equipped devices.  This information allows us real-time control of receiving devices.  While there are a lot of basic on-off commends (actions) like note, sustain, start, stop, there are other commands that offer a range of control, typically 1 – 128 (or zero – 127).  Basic computer stuff, so we are stuck with a lot of groups dealing with 8, 16, 128.  You get used to it.  These continuous controller commands can be used to change how the receiving device or sound responds to the movement of the continuous controller. 

Here, I am not talking about the keyboard or sample trigger.  These are basically in-put hardware.  A few examples commonly found are modulation wheels, pitch bend wheels, joysticks, ribbons, foot controllers, and faders.  As mentioned earlier, you can send channel information to a number of receiving devices.  You can use the keyboard as you Master controller and assign one continuous controller to signal the light board to fade in or out and anywhere in-between.  In some set-ups you can use a sustain pedal connected to the Master Controller and when depressed, the light board receives the command (MIDI message) and the fog machine will be triggered.  Key pad triggers can be set up to do the same thing, but as you know, not every device is compatible with every other device, and sometimes features are left out from model to model.  But with most available manufacturer’s, you can easily accomplish versions of the above.

Performing in a duo band, my partner and I played guitars, I played keys, we both sang, he controlled a drum machine with bass pedals and I controlled a programmable drum machine.  As we did more popular dance style music, I would use the drum machine (sometimes when it was idle during a song and sometimes as another layer…) to sequence the synth-bass line of a cover tune.  Then I could play more keyboard parts live for a fuller sound.  As a songwriter, I have used this a bunch to create new audio landscapes and textures I probably would not have found on my own.  So try this if you have the necessary toys;

Take a drum machine or a MIDI drum pattern and play it over and over.  Now, change the sound of the MIDI receiving device or direct to another tone generator (yes!, for visual effects you can also do this to run lights if the sequence is done with the light board in mind).  But don’t just change to another drum or percussion patch.  Change it to a synth bass sound or orchestral strings – and keep changing.  Some sound settings you will not hear anything at all (probably because the drum notes are typically short in duration (and should be as we will get to later) and the sound has a slow attack and is not responding quickly enough to make the programmed tones audible.  (for this you can try holding down a sustain pedal if available and see how the sound responds to longer duration) I plan to go into the properties of ADSR in future series, so we will cover that in detail later.  Some sounds you will not hear every note from the drum pattern but as you listen to a wide variety of sounds, you will find this is OK. 

If needed, change the MIDI Note Number (oh, man, another topic!) from a crash or cowbell in the drum pattern and you can make it trigger another note that might be closer to the key or scale you are working in.  As you know, MIDI also provides real time control, so you can trigger other devices using this function during live performances and still keep it live.

Now that we have our Master MIDI controller (‘Controller,’ ‘Keyboard’, ‘Triggers’, ‘Percussion Pads’, ‘Lighting Boards’ , etc.) connected to the receiving devices (‘drum module‘, ‘tone generator’, ‘lighting system’, ‘keyboard’, ‘sampler’, etc.) we should be able to trigger each receiving device from the Master.  Most receiving devices will have some sort of LED or other indicator to let you know the external device is receiving data.  If we set up as described earlier, changing the MIDI out channel on the Master will send the performance using that new channel.  Each receiving device stays on its designated channel. 

If you are recording, this will allow you to set up each MIDI channel to a MIDI track in your recorder, ‘DAW’ or PC – using internal sounds and ‘plug-ins’.  Track 1 to channel 1, track 2 to channel 2.  If you want to record more than a few times and over periods of time, work out and write down the channel assignment. That way your tracks will follow and will be easier to record and mix in days to come.  

Because drums are on channel 10 by default, that takes care of one!  As a suggestion, for one type of band configuration, set up 1 as the main MIDI chordal instrument sound.  Think main piano or organs.  Channel 2 can be strings or pads, 3 can be brass, 4 can be choir.  You pick what types of sounds your projects normally use and this will help get a recording and playback work flow. 

Most MIDI tone generators can play more than one sound and more than one type of sound at a time.  You may only have one tone generator or a PC that has all your sounds.  You may have many modules for specific instruments like piano or violins or drums.  There are a lot of cool toys for more complex MIDI rigs, and each has a unique ability to process or route data between devices.  Set up the recording templates as desired for the projects you take on.  Use the template to help you get started sooner. 

Once you have recorded each MIDI performance – assigned to individual track/channel – SAVE it!  LOL.  Each track should have its own MIDI channel and when you hit Play, those tracks will recreate the performance and send to all 16 tracks at a time.  As you Mute a track, you stop the playback of that channel. 

Once I ran sound and lights for a hi-energy keyboard heavy band.  I took a portable MIDI recorder and recorded the keyboard players performance.  Then I played each song over and over while I used the performance to sequence the MIDI lighting board we used.  That way when the band played through their set, I would start that song’s sequence and let it do the lights as often as possible, because it reflected what the band was playing better than random or volume based light patterns. (and because it was easy) If they changed the set I would pull up the sequence list and hit play when they started.  

Because there needs to be a direct wire connection between MIDI devices, it actually makes this much easier, but you just need to plan ahead a little.  For simple systems, setting up will be a quick foundation for more complex and growing systems.  In the most basic systems, you will have a controller or device that will transmit MIDI to another receiving device that will be able to respond to the MIDI data.  If you only have one controller, trigger or MIDI device, there is nothing to set up.

So we have examples of MIDI-equipped devices that will be the Master in our set up.  Words like ‘Controller,’ ‘Keyboard’, ‘Triggers’, ‘Percussion Pads’, ‘Lighting Boards’ can be translated into the devices we will play or perform on.  Keyboards can be used to trigger drum or trumpet sounds or even light boards……..  Drum Triggers can be used to play loops or sampled sounds.  Keep in mind MIDI will transmit (and/or record) the physical performance to other devices.

To make sure each device ignores the data going to other devices – yes, remember the 16 channels traveling through each MIDI cable?  Here they come in handy.

If we go back to the basic setup, the Master can be set to transmit MIDI to those possible channels in a number of ways including;

  1. Send No Signal at all (OFF)
  2. Send to any one of the 16 channels
  3. Send to more than one channel

So first, we want the Master to talk to one external MIDI device.  As long as the Master and the receiving device are set to the same channel, the device will respond to information from the selected channel(s).  It is easy to start with channel 1, and many manufacturers will set their default to transmit on channel 1.

There are always exceptions and some become standard features by popularity.  Drum machines were commonly used on channel 10.  So connecting a drum machine or percussion triggers to a ‘drum module‘, use channel 10.

Most MIDI receiver devices will be able to respond to signals in a number of ways including;

  1. No channels (OFF)
  2. Listen to any one channel at a time
  3. Omni – listen to all 16 channels at once

If you have problems getting receiving device to respond, try #3 above.

As we add devices we can +1 on the Master out channel to send to other devices now in the chain of MIDI cables connecting each device as described briefly earlier.  Set each new receiving device to listen to that channel only (in common and standard systems).

Next series let’s go over recording and playing MIDI performances.