Posts Tagged ‘#musicequiptment’

CRASH LANDING

I posted another you-tube segment of Crash Landing playing cover tunes at a gig in Cincinnati back in 2002. This is the last segment of the 1st set. I tried to break them up into chunks so they are not huge files.

I ran a straight line out from the mixing board. Few live recordings are perfect, and over the years I tried a number of ways to get a good mix. Keep in mind I record all the time so this was not a special occasion and I don’t even think I told the band members we were recording.

I am still collecting new photos from friends and relatives and will add them to future posts. So sit down and grab your favorite beverage and listen to a great live band!

As part of My Cover Tune Tuesdays, I wanted to do an acoustic version of one of my favorite Grateful Dead songs. The story I heard about this song is that Stella Blue refers to an old cheap guitar Jerry Garcia played when he was much younger. I tried to look up references but nothing conclusive so I stopped. I am not a reporter, after all.

In either case, this song has been an inspiration for me in many ways. As I get older, though, the message is much closer to home. I hope I will be able to dust off the strings for years to come, but I still find each moment I have to make and play music precious. Without it I would be insane, lost or dead (but not grateful)!

So I got out the Martin 6 string acoustic/electric guitar I got from my older brother and changed the strings. It was not enough to dust them off! Then I pulled out my Ovation 12 string acoustic/electric guitar and dusted off those strings. The Martin I ran a guitar cable to the Universal Audio Solo 610 mic pre-amp. After recording the main guitar track in Sonar by Cakewalk/Bandlab I used the Ovation 12 String guitar for a light/filler guitar track. I used a AKG C214 microphone plugged into the Solo 610 for recording the Ovation. Vocals used the same microphone and pre-amp set-up so it was a quick session.

All the years combine
They melt into a dream
A broken angel sings
From a guitar.
In the end there's just a song
Comes crying up the night
Through all the broken dreams
And vanished years.

Stella Blue         Stella Blue
I've stayed in every blue-light cheap hotel
Can't win for trying
Dust off those rusty strings just
One more time
Gonna make them shine. 

When all the cards are down
There's nothing left to see
There's just the pavement left
And broken dreams.
In the end there's still that song
Comes crying like the wind
Down every lonely street
That's ever been.

Stella Blue         Stella Blue 
I've stayed in every blue-light cheap hotel
Can't win for trying
Dust off those rusty strings just
One more time
Gonna make them shine.

It all rolls into one
And nothing comes for free
There's nothing you can hold
For very long.
And when you hear that song
Come crying like the wind
It seems like all this life 
Was just a dream.

To Stella Blue         Stella Blue

Songwriters: Jerome J. Garcia / Robert C. Hunter
Stella Blue lyrics © Universal Music Publishing Group

As I continue to dig into past songs it is easy to see one problem I have;  I am not good at naming my songs.  Sometimes I go for the punch line, but the punch line is not even a line in the song!  Sometimes I try to highlight one phrase, but ignoring conventional songwriting wisdom, I do not use a phrase over and over in the chorus and call that the title.  So here is another example where the names have changed over the years.  Originally the title was “A Few Shattered Lines“.  I was reading a letter from a friend of mine at college and I pulled some of his phrases into the lyrics. Below are the results.

Reels of Tape has a deep meaning for me.  I spent a lot of years recording on reel to reel tape decks.  I still have my original 4 track TEAC machine.  The lyrics are more abstract than other songs I have written and for some reason I can still slip back to those times when I hear this song.  I am using my Ovation Balladeer 12 string guitar as my standard writing/recording instrument over the years, and I just love the tone and the progression of the chords.  The twelve strings just sound so full, and when using open tuning, it can make the chords sparkle.  The other quick observation: I don’t get rid of equipment I buy…… I keep it forever!

The lyrics seem to create images that expand beyond the words.  Familiar topics can do that sometimes when looked at with a different point of view or even a change in mood.  I love – Life pours past the flags unfurled, Crack the crystal paralyzed world – and other parts, but I could not really tell you why.  Another phrase that sticks with me is – Forget today and tomorrow, leave this song behind, and all it’s sorrow.  a lot of my lyrics have a rather dark perspective.  But behind them all is a sense of hope and a promise that things will get better and improve.  I am one of the most optimistic people I know!

https://itunes.apple.com/us/album/dark-energy/id962943592

Recording as an acoustic tune, I use one track for the vocals (unless there is a harmony track) and I use another track for the ‘line out’ from the acoustic/electric guitar, and then I use another track for a microphone placed in front of the 12 string (even here, it is important to place the microphone at the ‘sweet spot’  to get the best tone.  Placing a microphone in front of anything without testing will more often disappoint rather than delight.  As in other posts, I have had better success if I literally stick my head up to the instrument and move back and forth until I get the best sound.  Doing this while playing the instrument is not practical, so I place the microphone, record, listen and compare it to other tracks that use a different microphone position.  Once you have the best of the best, you can be pretty safe using it again.  Live situations with full bands and instrumentation is a challenge and I still try to stick my face in there to get an idea what that instrument sounds like but also if it is close to other instruments, speakers, or unwanted noise makers.  Most vocalists will stand in front of the microphone, but even in this case if they lean or tilt one way or the other it can dramatically affect the final tone or sound.  Much of this is tied to the proximity effect and we will get into that later. For the most part I will pan the 12 string guitar line out to hard Left and the microphone for the 12 string hard Right.  Vocals go in the center, unless you have more than one vocalist or lead singer.  I use very few processors like compressors, gates, limiters, and the like.  As long as you start with a solid tone a bit of EQ if needed, bring in some light reverb or delay and the mix is done.

I don’t mind acknowledging that I am different than a lot of the people I know and hear about.

I am PERFECTLY OK with this.  I know my music and lyrics are not the typical main-stream songs blasted everywhere.  I will not appear on any searches.  Growing up and watching all the Westerns and TV shows, I never – not even once – wanted to be the cowboy or the soldier.  I identified with the ‘good guys’ as most kids do, but to me the cowboys and soldiers were not the only good guys.  I identified more with the American Indians living with nature rather than conquering.

I am not sure what exactly inspired this song when I started it.  I often think about music videos and how that could help explain through images some of the themes in this musical piece.  Possibly the new toys that could make sounds that added less traditional Western culture ideas and more ethnic and international instruments.  I also like contrapuntal rhythms and themes, so you will hear a lot in these pieces.

https://itunes.apple.com/us/album/touch-down/id962542289

I want to give you an idea of perspective on some of the articles I have posted and will continue to post going forward.  This is the first video I have posted and while it is rather BORING, it is so informative at the same time.  I guess I have recorded original tunes since the very late 1960’s.  I recorded everything.  I deleted a lot!  But I recorded everything I could.  I experimented and adjusted and re-did and failed a few more times than I succeeded in the early days to be sure!  I also got into photography and then into video recording.  I practiced the mundane over and over until I got the exposure right, then with video until I could zoom and focus manually.  I joined the photography club in high school and learned to develop and enlarge my own pictures – something I thought was close to magic back in the day!

I shared earlier that I used (and still own!!!) what I think was the first personal computer to come out with built in MIDI ports – The Atari ST!  I used a software program back then to record the MIDI tracks and I could generate SMPTE time code and send a signal from the Atari to sync it up with recording machines (I had the Yamaha 4 track CASSETTE recorder during most of this).  When I talk about old technologies and how we used to record songs (or develop pictures…) It is hard for some to understand the challenges we had and the lo-fi quality of the final mix or product.

I want to use this video as an example of many things I refer to in this blog.  In this video, you will see what I saw when looking at the Atari computer monitor when I was playing or recording tracks.  Keep in mind this is all MIDI equipment available years ago.  The song I posted earlier will now be stripped of all guitars, vocals, effects and additional live sounds you heard on the full mix.  As you watch the video you will hear the sequences being played back live into the VCR input.  I took the monitor video out and connected to video in of the video recorder so this is a straight feed for both.  In the recording software, each “instrument” has a separate track.  Drums are all on one track with additional percussion sounds on different tracks, and as a reminder, each note (as triggered from my DX7 keyboard) represented a different drum/percussion sound coming from a drum machine.  You can hear the metronome from the Atari ticking away in the back ground as it is set to record.  As each track plays you can see the musical notes light up depending on the intensity of the track information.  You can also see the tempo of the song, the names of the tracks and the measures and beats as they click by.

The main piano sound is probably familiar to many of you even if you are quite young. It is the classic Piano Tine sound from the Yamaha DX7 synthesizers.  This video should also give you a sense of quality and resolution available at the time.  It might be difficult to hear the difference in song recording quality today, but we are all familiar with video resolution and HD cameras and large screen TV and computer standards available now.  Just think how this applied to the audio quality back then and then play some really old songs you grew up listening to.   It gives a better appreciation and perspective for some of the classic songs that seem to live forever.

 https://itunes.apple.com/us/album/touch-down/id962542289

For me, sequencing is fun and very versatile.  I am not the kind of keyboard player that can jump in on any song and just start jamming.  I do better if I can take my time and learn, practice, and improve before practicing with a full band.  A lot of this might be from the lack of confidence in the early days, but in reality I find myself a jack of all trades and master of none.  If I had spent more time on any one instrument, I might have gotten pretty good.  Fortunately – or unfortunately, I have always been interested in so many different things that my chops were not the best.  As a percussionist, I was able to hear what I wanted, but did not play drum kits so my feet and hands were always locked in perfect step!  Sequencing gave me the ability to lay down rough performances on the keyboard (and remember I use the keyboard keys to ‘trigger’ the drum sounds, so I am still playing keys).  Once recorded using MIDI – again I am not recording the sounds but the physical action and movements, I could enter the Edit Mode on the sequencer and make corrections to timing, notes, durations etc. until the piece felt good to me. For the drums, the standard practice is to use the Quantizing feature (I can go into this later as well for future posts) to make sure all beats were perfectly ‘on the grid’.  I have used drum machines and sequencers since they first came out.  The sounds are great but too often the result of overusing the quantize feature makes the drum tracks sound mechanical – unmoving – and even impossible for a real drummer.  I preferred to leave a little slop here and there.  I want emotion in my songs, not perfection.

In “Bassics”, I just enjoyed the new sounds I had and played with this Bass Guitar patch and came up with the basic groove.   I like adding textures and unusual percussion/FX sounds to keep the songs flowing and changing.  Available sounds are so much better now, but I still enjoy bringing out these old tunes.

When you start off with well-balanced levels on all inputs, you can make changes in confidence.  During sound check; which is AFTER Gain Staging and setting up the board for the current event, you added each band member and their related instruments to the process and you have good levels on all tracks/channels.  I try to grab a few minutes once all drum inputs (including drummer vocal pic or other percussion and tone generators) are set properly to have the drummer play for a few minutes without other musicians.  This helps get the feel of the entire drum kit and this is when you would balance all the levels.  The hi-hat for example, might not be hitting the meters in the upper range but it sounds really loud if its fader is up to the nominal level.  It is helpful to know once the board is set you can turn the volume on any track DOWN any time you want.  You just do not want to turn anything up beyond the sweet spot except for the occasional solo or special piece that might need additional reinforcement or boost out in the audience.  And as always, try to return to the sweet spot area once the section is over.

Some mixing consoles allow you to assign tracks to separate signal paths or additional outs.  These can be grouped to a single sub fader when running system in mono.  You can then take the individual drum tracks out of the house mix and send them only to the bus for your drum kit.  Assign this bus 1 for example to the Mains and the fader now for bus 1 will allow you to adjust the volume level of the entire drum kit (not the drummer’s mic if he or she also sings) with one fader!  If you need to change the volume of the kit as the event goes on, you can keep the blend and balance of all levels by using the bus 1 fader.  This might come in handy more than you might think, and it is easy to set up.

Then I do the same thing with the vocals if you have more than two vocalists on stage.  They can also be grouped to bus 2 for example and you can adjust vocals with one fader and not worry about changing the balance of the singers/vocalists on stage.  Brass and string sections and even a number of guests sitting at a table can also be grouped the same way.  You can still change the EQ setting for each channel in a group or bus and you can still change effects levels anytime you want without affecting the balance. 

Now if you think about it, we have grouped similar instruments together, set them up to control group volume with a single fader and we have the tracks and effects returns that might need minor adjustments during the event isolated and easy to see or adjust.  Your job now consists of only a few faders out of all the channels plugged into the mixer.  You are now in auto-pilot. Do not change anything major unless the performance or venue dictates a change.  From here you coast and make things better with ever smaller adjustments.  Time to add the glitter.

For most situations the process above will set you up in a comfortable area where things can all be heard at balanced levels, not too loud and instruments do not compete for the same frequency space.  For this step it is better to think  of sound from low frequencies on the left and higher frequencies on the right.  In many ways like a piano;  lower notes are on the left and increasingly higher notes as we go to the right keys.  Have your drummer hit one of the cymbals really hard with no other noise and see if it produces tones or frequencies like the lowest key on a piano.  It cannot.  It is in a much higher range.  Have the drummer punch the kick drum a few times and see if it makes frequencies as hi as the cymbals just did.  This is a simple explanation that gets applied to all instruments and vocals being blended into a smooth mix.   When using EQ, you can shift the range of frequencies for each sound so it does not compete or collide with other sounds in similar frequency ranges.  Often vocals and guitars are in neighboring groups.  Try using EQ to edge one signal a litter higher in the frequency group and the other a little lower.  So they still sound good and accurate like they are on stage, but just enough so the listener can more easily hear the two sources as individual elements in a wider landscape.  Similar situation with kick drums and the bass guitar.  Both occupy the very low end of our hearing spectrum.  If they are both deep in the low end, they might not be discernable as two performances.  You can try lowering the low end EQ a little on the bass guitar for example, but add some hi-mids and or a little hi end frequencies so the strings pop in the mix a little when struck.  It will still support the low end for that punch, but you will be able to hear the individual bass notes better without a lot of added low-end volume that can cloud or muddy up the low end.

20150215_173005Not only do we have 16 channels of MIDI available (per cable…. Other cables can carry 16 more channels as you expand) but we also have 128 steps or individual notes that can be assigned to each channel or voice.  (again, if your device counts zero as a number, you will have 0 – 127)  This is particularly important for triggers and non-sound system controllers.  For example, if you are playing a MIDI keyboard, sax or reed controller as Master, you are not normally trying to redirect a C# to an F, though there are reasons for doing this in some special circumstances.  You just want to perform your song on the Master Controller and have your performance represented as you played it – for better or worse!

However, for drum kits and other triggers it is crucial to set up in advance the sounds that will be played when a specific trigger is hit.  Usually you can change this in the Master Controller itself.  Pick the channel and the specific pad/key you are editing and go to the Menu Options page.   Select MIDI Note Number options.  There are too many ways today’s gear will get you there or what they call it so it is hard to make this specific to all, but that is what the owner manuals are for!  As your Master Controller is connected properly to the receiving tone generator or receiving device, hit the pad or key or button you are trying to edit.  You should be able to see the note number the current pad is assigned to.  Continue to raise or lower this number one digit at a time or enter the KNOWN MIDI Note Number and then Enter.  Once you are triggering the correct sound, sampler or other gear, go to the next pad in a similar mode until all assigned pads correctly trigger the intended receiver.  Save everything and pat yourself on the back!  Keep in mind you can do this over and over depending on project, recording or performance needs.  Most devices will allow you to store and recall a large number of performance templates or basic ‘kits’.  Take advantage of this tool!   Once you set them up, you can use them forever and make your set up time amazingly quick. 

As a keyboard player in a progressive rock band, I used specific keys or notes on my keyboard(s) that were outside the range of the cover or original tune we were playing and assigned them to trigger internal drum sounds like claps or cowbells, effects like record scratching and anything from applause to choir back-up notes.  I never used a sampler that would ‘play’ parts, I just added to the layers by using on-board sounds as a split keyboard arrangement or as real-time triggers to other devices. 

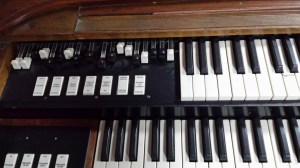
I used to play in the days when you had to have a different keyboard for each sound group you wanted.  If you wanted an electric piano, you played the Rhodes piano.


 20150215_172119 If you wanted an organ sound you carried around a Hammond or other organ.  If you wanted to use synthesizer sounds, you brought in a Moog or Arp and played two sounds at a time ……. and it felt glorious! 

Sound reinforcement can be broken up into simple segments and based on need of reinforcement project, we can narrow down the staggering options that can distract us.  Let’s dig in.

If you will only use pre-recorded music or audio tracks, this is relatively easy and you will get there quickly.  I will concentrate on the live performance for this series.  We will look at the needs of the band members, the requirements of the audio gear, understanding the environmental effects and the basic strategy to make it all work together.

Once you know the number of performers and the location of the event, you can begin planning on getting the gear you need and an idea of the requirements for great sounding – crowd pleasing live events.  The first step is to get an idea of the show/act/performance.  Live drums?  Keyboards or brass section?  Speech or information, you get the idea. 

Get an accurate count of the number of inputs you will need.  The total is important.  This can determine the size and capability of the mixer and the requirements of cabling, ‘monitors’, stands and microphones needed to cover the performance.  Then break them down into basic groups. 

Keep in mind that for making a live performance work, you need to have two totally independent sound systems available and in control so if we think about it, there is a sound system on the stage with the performers so they can hear themselves – and other performers – and any media they need to be aware of or perform with.  The audience requires the second system and this makes the party get started when the ‘house sound‘ gets cranked up and sounds great.

Most band /performer gear and audio cables will be connected to a long cable with a box at the end called a ‘snake‘.  Most inputs will be ‘mic‘ cables with three connectors for low ‘impedance‘ sources.  The microphone of your choice connects to a mic cable then gets plugged into this box on stage.  The snake connects that input to a very long cable leading up to the ‘mixing or sound board‘.  The sound board can listen separately to each input from the snake and can send that signal to a variety of ‘audio outs‘.  We will focus on the basic ones needed the vast majority of the time now and add more later on in this series.

The mixer – sound engineer will be able to send some of each performer’s input signal back through the snake to the amplifiers and their related on-stage speakers or in-ear monitors, etc.  (in this process it is really handy for the sound engineer to bring his/her own microphone….!!!!  That way once you turn on the stage monitors (on-stage speakers for performers) you can talk directly to anyone on stage and the main speakers going to the audience can be turned off so the audience will not hear you).  This allows you to quickly communicate to band members to help you sound check quickly.

The mixer – sound engineer will also send measured amounts of all performers’ inputs – all blended into a clear representation of the performance – to the main or house amplifiers and their related speakers/cabinets.  Effects like reverb and delay can be added to enhance the overall sound and ‘feel’ of the music/performance. 

That is the first goal.  Create two sound systems with the mixing board as the hub.  Operate them independently and you will be miles ahead of the rest of the ‘sound gurus’ I have heard out there.